
Kitchen and Bath Remodel Sequencing: Order of Work
Master kitchen and bath remodel sequencing order of work to avoid rework and delays. Call (833)-700-4293 for expert guidance.

By Andrew Parker
Learn more about Bathroom Remodel for guides, costs, and what to expect.
Compare Bathroom Remodel Pros Near You

Enter your ZIP code to compare top-rated local professionals and request free quotes.
The wall is open, the plumber is asking where the shower valve goes, the electrician wants to know if the vanity lights are on a separate circuit, and the tile setter is already texting about a delivery window. If that scene feels familiar, you are not alone. Kitchen and bath remodels fail on schedule for one main reason: the work gets done out of order. A beautiful design means little if the rough plumbing goes in after the drywall, or if the tile is set before the shower pan is inspected. Understanding kitchen and bath remodel sequencing order of work is the difference between a smooth project and weeks of expensive rework. This guide walks through the correct sequence, from demolition to final paint, so you can coordinate trades, schedule inspections, and keep your renovation moving forward.
Why Sequence Matters More Than Speed
Every kitchen and bath project is a chain of dependencies. Demolition must happen before rough-in because walls need to be open. Rough-in must be inspected before insulation and drywall because the inspector needs to see the pipes and wires. Finish work must wait until the substrate is stable and the layout is locked. When one trade jumps ahead, another trade has to undo and redo work, and that is where budgets bleed.
Think of the remodel as two overlapping phases: the hidden work and the visible work. The hidden phase includes framing, plumbing, electrical, and HVAC rough-in. The visible phase includes tile, cabinets, fixtures, paint, and trim. The sequencing order of work protects the hidden phase first, because once it is covered up, mistakes become demolition projects. Homeowners who respect this order avoid the most common and costly delays.
There is also a financial reason to sequence carefully. Inspections are tied to specific milestones. If you skip a rough-in inspection, you may be forced to open finished walls later, which adds cost and time. Scheduling inspections at the right point in the sequence keeps your permit valid and your project insurable. For a deeper look at how kitchen upgrades translate into resale value, see this guide on how much value a kitchen remodel adds.
The Core Sequence: From Demolition to Final Walkthrough
The standard sequence for a kitchen or bath remodel follows a predictable path. While every project has unique twists, the order below reflects how experienced general contractors manage trade ordering. Use it as your master schedule and adjust only when a professional explains why a deviation is safe.
- Design, permits, and material selections. Finalize layouts, order long-lead items, and pull permits before any hammer swings.
- Demolition and site protection. Remove old cabinets, fixtures, tile, and drywall, then inspect the framing for hidden damage.
- Structural and framing changes. Move or reinforce walls, reframe openings, and address subfloor issues.
- Rough-in plumbing, electrical, and HVAC. Run new supply lines, drains, vents, wiring, and ductwork while walls are open.
- Inspections of rough-in work. Schedule plumbing, electrical, and mechanical inspections before closing walls.
- Insulation and drywall. Insulate exterior walls, hang and finish drywall, then prime.
- Waterproofing and tile substrate. Install cement board or waterproof membrane in wet areas and inspect before tile.
- Tile and flooring. Set floor tile, shower tile, and backsplash after layout is confirmed and surfaces are flat.
- Cabinets, countertops, and fixtures. Install cabinets, template and set counters, then connect sinks, faucets, and toilets.
- Finish electrical and plumbing. Install outlets, switches, light fixtures, and trim out plumbing connections.
- Paint, trim, and hardware. Apply finish paint, install trim, and mount hardware and accessories.
- Final inspection and punch list. Complete the final walkthrough, correct punch items, and close out the permit.
This sequence is not arbitrary. Each step creates a stable base for the next. For example, cabinets cannot be installed until flooring is complete or at least protected, and countertops cannot be templated until cabinets are level and secured. Tile cannot be set until waterproofing has cured. When you view the project as a series of handoffs, the order of work becomes easier to defend with your contractor and easier to explain to your family.
One practical tip: build your schedule around inspections, not around trade availability. Inspectors often have lead times, and a missed inspection can stall the entire job. Ask your general contractor to book inspections as soon as the rough-in is complete, and keep a buffer of two to three days before drywall. That buffer protects you from surprises.
Coordinating Plumbers, Electricians, and Tile Setters
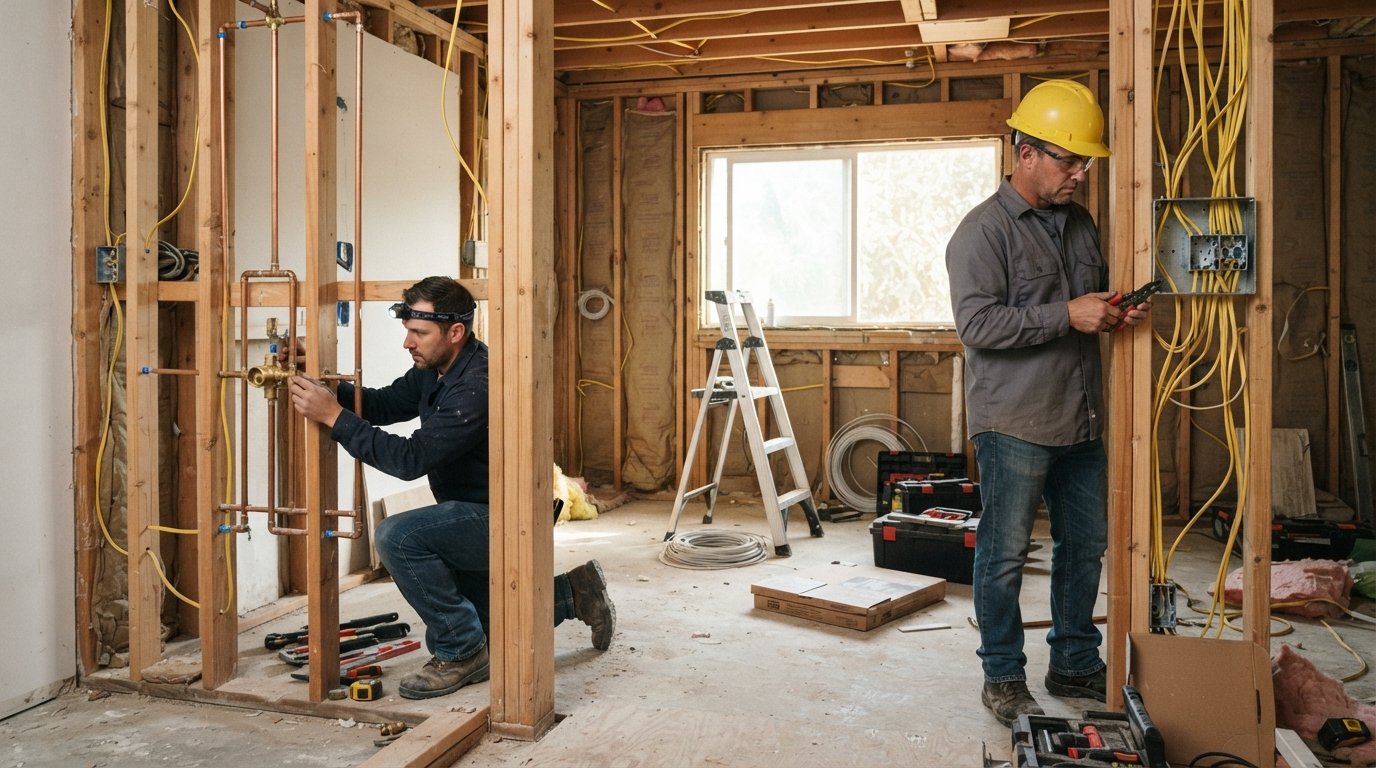
The three trades most likely to collide in a kitchen or bath remodel are plumbing, electrical, and tile. Each has a natural window, and each depends on the others. Plumbers need open walls for supply and drain lines, but they also need to know where the vanity, toilet, and shower valve will sit. Electricians need open walls for wiring, but they must coordinate with the plumber so that no one drills through a newly installed pipe. Tile setters need a flat, waterproof substrate and a confirmed layout, which means they come after rough-in inspections and drywall.
Here is how a general contractor typically sequences these trades:
- Plumber first for rough-in. Set the drain and supply locations, install the shower valve, and pressure-test the lines.
- Electrician second for rough-in. Run dedicated circuits for the bathroom, kitchen appliances, and lighting, and install junction boxes before insulation.
- HVAC third when needed. Move or add vents, and confirm that ductwork does not conflict with plumbing or electrical runs.
- Inspections next. Complete rough-in inspections before any wall is closed.
- Tile setter after waterproofing. Install backer board or membrane, flood-test the shower pan if required, then set tile.
The coordination challenge is not just technical; it is logistical. Plumbers and electricians often work in the same small space, and a bathroom can feel crowded with two crews. A good general contractor staggers their arrivals, keeps a shared schedule, and walks the site with each trade before work begins. That walkthrough prevents the classic mistake of an electrician drilling through a drain line because no one marked the pipe locations.
For homeowners acting as their own general contractor, the lesson is to create a written sequence and share it with every trade. A simple one-page schedule that lists who is on site when, and what must be complete before they start, reduces confusion dramatically. If you are hiring individual trades, consider using a platform that connects you with pre-vetted local professionals, such as FreeQuotes.Contractors, to compare bids and confirm availability before you lock in dates.
Where Inspections Fit in the Timeline
Inspections are not interruptions; they are milestones. In most jurisdictions, a kitchen or bath remodel requires at least a rough-in inspection and a final inspection. Some areas also require a separate waterproofing inspection or a framing inspection. The timing of these inspections is dictated by the sequence of work, not by convenience.
The rough-in inspection happens after plumbing, electrical, and mechanical work is complete but before insulation and drywall. The inspector needs to see the pipes, wires, and vents in their raw state. If you install drywall first, you will likely fail the inspection and have to remove it. The final inspection happens after all finish work is complete and the project is ready for occupancy. Between those two points, some projects require a shower pan flood test, which must be witnessed or documented before tile is set.
Here is a practical checklist for inspection timing:
- Rough-in inspection: after plumbing, electrical, and HVAC rough-in, before insulation and drywall.
- Framing inspection: after structural changes, before rough-in if required by your permit.
- Waterproofing inspection: after membrane installation and flood test, before tile.
- Final inspection: after fixtures, outlets, and finishes are installed, before you close the permit.
Ask your general contractor to confirm the inspection requirements for your specific permit. Requirements vary by city and county, and a missed inspection can delay your project by a week or more. Build inspection dates into your schedule and treat them as fixed appointments, not flexible checkpoints.
Common Sequencing Mistakes That Cause Rework
Most remodel disasters trace back to a handful of sequencing errors. Knowing them in advance helps you spot trouble before it becomes expensive. Here are the mistakes that general contractors see most often.
Installing drywall before rough-in inspections. This is the classic error. Homeowners eager to see progress close up the walls, only to learn that the inspector needs to see the plumbing and electrical work. The result is demolition of new drywall and a stalled schedule.
Setting tile before the shower pan is tested. A leaking shower pan discovered after tile installation means removing tile and backer board. Always complete the flood test and waterproofing inspection before tile goes down.
Ordering cabinets before final measurements. Cabinets are long-lead items, but they must be ordered after the space is measured and the layout is confirmed. Ordering too early can result in cabinets that do not fit, especially if walls are out of square.
Scheduling countertop template before cabinets are level. Countertops are fabricated to precise dimensions. If cabinets are not set and leveled, the template will be wrong, and the countertops will not fit.
Painting before tile and trim. Paint is a finish, not a base. If you paint before tile or trim installation, you will need touch-ups and repairs. Paint should come after the dusty work is complete and after most trim is installed.
Each of these mistakes costs time and money. The fix is a written sequence that every trade agrees to, plus a general contractor who enforces it. If you are managing the project yourself, keep a printed schedule on site and review it at the start of each week.
How a General Contractor Manages Trade Ordering
A general contractor earns their fee largely by managing sequence and coordination. They do not just hire trades; they decide who comes when, what must be finished before the next trade starts, and how to recover when something slips. Good general contractors use a combination of scheduling tools, site walkthroughs, and written scopes of work to keep the order intact.
First, the general contractor builds a master schedule that lists every trade, every inspection, and every material delivery. That schedule is shared with all trades and updated weekly. Second, the general contractor holds a pre-construction meeting with each trade to confirm scope and sequence. Third, the general contractor inspects work at each handoff, so that the next trade does not inherit a problem. For example, the plumber's rough-in is checked before the electrician arrives, and the drywall is checked before the tile setter starts.
When a delay happens, the general contractor resequences rather than panics. If cabinets are late, they may move paint and trim ahead in another area, or they may adjust the tile schedule to keep the crew productive. That flexibility is valuable, but it depends on a clear baseline sequence. Without a baseline, resequencing becomes chaos.
Homeowners can adopt some of these practices even without a general contractor. Create a simple schedule with dates and dependencies, share it with every trade, and confirm each handoff in writing. If you need help finding qualified trades, use a service that pre-vets contractors and lets you compare quotes. Contractor.Homes offers a free quote request system that connects homeowners with local professionals across kitchen and bath remodeling, plumbing, electrical, and more.
Frequently Asked Questions About Remodel Sequencing
Can I install cabinets before flooring? In many kitchens, cabinets are installed first and flooring is run up to the cabinet toe kick. In bathrooms, flooring often goes down before the vanity. The right order depends on the flooring type and the cabinet design. Discuss it with your contractor before work begins.
Do I need a permit for a cosmetic remodel? Cosmetic updates like paint and fixtures may not require a permit, but any changes to plumbing, electrical, or structural elements usually do. Always confirm with your local building department.
How long does a typical kitchen and bath remodel take? A bathroom remodel often takes three to six weeks, while a kitchen remodel can take six to twelve weeks or more, depending on scope and material lead times. Sequencing delays are the most common cause of overruns.
What if my contractor wants to change the order? Ask why. Sometimes a change is justified by site conditions or material availability. But if the change skips an inspection or covers rough-in work before it is approved, push back.
Understanding kitchen and bath remodel sequencing order of work gives you control over your project. You can spot problems early, ask better questions, and keep your renovation on schedule. Whether you hire a general contractor or manage trades yourself, the sequence is your roadmap.
Ready to start your remodel? Request free quotes from pre-vetted local contractors and compare bids with confidence.